I still remember my first Isolation Vault run in Warframe's Cambion Drift: a squad of four, a bait canister, and a cave full of Infested that seemed personally offended by our existence. In 2026, after years of updates, new frames, Incarnon adapters, and whatever else Digital Extremes has thrown into the Origin System, the Vault loop remains one of Deimos' most rewarding detours. But is it still worth your time? Absolutely—if you know what you are doing. Here is how I run Isolation Vaults now, from the first Mother bounty to the final hidden room.

Start with Mother, then follow Loid ✅
Everything begins in the Necralisk. I talk to Mother and pick up an Isolation Vault bounty. Once I load into the Cambion Drift, Loid asks the squad to collect residue. The residue is marked on the map, so I usually split from my team and vacuum it up on my way to the bait station. The amount scales with party size: solo players typically need six residue, while a full four-player squad can need up to twelve. That is one reason I often run Vaults solo or with one friend—less running, fewer surprises.

Defend the bait station
Crafting the bait takes a few minutes, and that is when the Infested decide to crash the party. It plays like a Defense mission: keep the station alive while waves of enemies converge. Frames that can pull enemies away from the objective are invaluable here. Nidus and Khora are my go-to picks, but any crowd-control frame can make this section painless. I also like to bring a strong area-of-effect weapon because the Infested do not care about personal space.
When Loid finishes the bait, one player must grab the canister and head into the caves below. The Infested door only opens with that bait. I use the alternate attack button to throw the canister into the door. If I miss, we start over. If the objective bugs out, I return to Necralisk and restart the bounty. It is annoying, but it is rare enough that I still run Vaults regularly.

Survive the toxic cave
Inside the cave, the air is toxic. This objective is basically an inverse Survival mission: instead of grabbing life support from dead enemies, I reduce toxicity by killing Infested. The arena is small but has plenty of headroom, so I want frames that can kill enemies as they spawn. Equinox, Mesa, Ember, Khora, and Volt are fantastic choices. I have also used a well-built Xaku here, and the sheer enemy density makes the toxicity meter drop fast. The goal is simple: do not let toxicity reach critical.
Break the Necramechs ⚠️
Reducing toxicity opens the Vault proper. Inside, there can be up to three Necramechs depending on the Vault tier. On my first Vault run in a particular worm cycle, there is always one Necramech. These machines are incredibly tough. I focus on their arms first to remove their weapons. Once the arms are destroyed, I shoot the mech's back, where a giant blue scar marks its vulnerability. When the Necramech has an invincible icon on its health bar, I stop shooting. It reflects all damage back to the player, and that can instantly kill me. I use Void damage from an Operator's Amp or Xaku's first ability to remove the reflect shielding safely.

Choose your reward: leave or stay
After the Necramechs are down, I can either leave through the Esophage that spawns or activate the Vault's Reactive Crystal to summon Loid. If I am farming Necramech parts, leaving and restarting the bounty is not a bad idea. If I am short on resources, I stay, because Isolation Vault rewards provide a great amount of Deimos resources and loot. The choice depends on what I need that day.
Before summoning Loid, I often farm the Requiem pylons inside the Vault. Each Vault has at least one pylon, and some have two. I enter my Necramech to start these encounters and complete the challenge tied to that monolith. The Infested keep spawning during this stage until I leave or summon Loid, so it is a good idea to clear them before moving on.

Escort Loid and solve the door
Summoning Loid starts the next objective. He navigates to four different Reactive Crystals throughout the Vault, and I must defend him while he activates them. He has a large health pool, but he can still die if the squad ignores the Infested waves. To speed this up, I bring Wisp and place Haste Motes for Loid. He will pluck the Motes and gain the full movement speed increase, making the objective much faster. Loki can Switch Teleport Loid, Nova can teleport him, and an Operator's Void Blast heals him for 500 Health.

When Loid finishes, he travels to the Vault door where I summoned him. Four symbols appear on the door, and I must activate all four Reactive Crystals in the same order. The squad gets three tries. Failing locks the Vault door, meaning we restart the bounty entirely. Fortunately, this part is less stressful than it sounds. I have an Operator ready when Loid reaches the door. Once the symbols pop up, I immediately fire at the Reactive Crystals in order. If I am fast enough, one player can open the door without memorizing anything. For teams that struggle, I recommend callouts for each Requiem symbol.
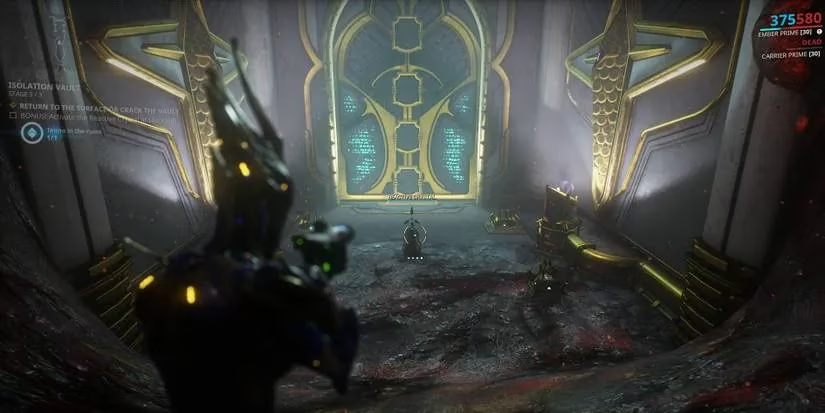
Entering the correct combination opens the door. I smash the containers inside and take everything. Then I head back to the surface to either return to Necralisk or start another Vault bounty.
Vault tiers and Mother's pod locations
Teams that farm Vault runs repeatedly can do so without ever leaving the Cambion Drift. I look for Mother's Infested pod throughout the map and interact with it. The location of the Mother pod determines what tier of Vault bounty she offers. To unlock higher tiers, I first complete subsequent Vault tiers. Tier two unlocks after a tier one bounty, while tier three is locked behind tier one and two. Once a tier is unlocked, it is always available.
| Tier | Location |
|---|---|
| Tier One | Undulatum |
| Tier Two | Between Albrecht's Prospect and Catabolic Gutter |
| Tier Three | The Abscess |
I can also obtain tier three Vault bounties from Mother in the Necralisk hub town, provided I have unlocked them. That is a nice quality-of-life change from the early days, when the grind felt much stricter.

Hidden rooms and Arcana bounties 💡
There are six Vaults in the Cambion Drift currently. Four of these Vaults have hidden rooms. All of them can be unlocked by finding hidden Reactive Crystals in the arena and activating them with Void damage. I keep an eye out for these Crystals because they can unlock rooms with additional loot.
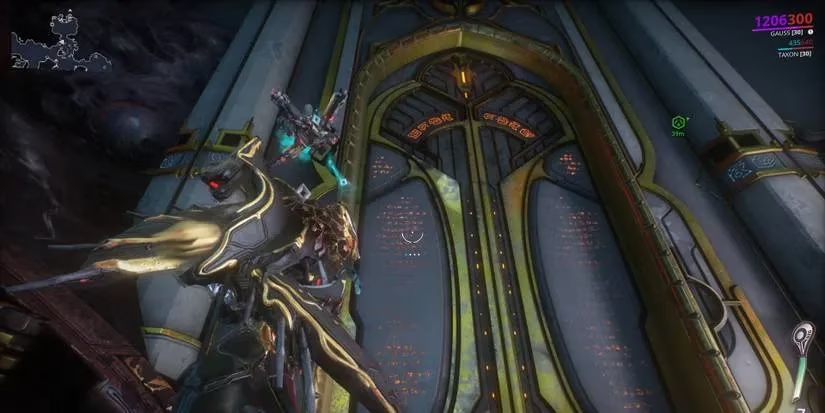
After finishing an Isolation Vault run for the first time, I unlock Arcana bounties. These bounties differ in objectives and rewards, tasking players with clearing out the exterior sections of certain Vaults. Rewards include Necramech Mods, parts for the Sporothrix and Arum Spinosa weapons, and typical Vault rewards such as Relics and Orokin Matrix parts. Arcana objectives can include assassinating a Mitosid Rex, recovering a cache from an Infested Hive, collecting plant samples after activating a Purifier, destroying three Hives, keeping control of a zone against Infested waves, defeating a Juggernaut after it collects three Fungal Polyps, collecting fluid sacks and destroying marked targets, or sealing fissures on Deimos similar to the Orb Vallis Thermia Fracture activity. Each has bonus rewards for performing well.

Final thoughts
In 2026, Isolation Vaults are not the newest content in Warframe, but they are still one of the best resource farms on Deimos. The loop is familiar: talk to Mother, collect residue, defend the bait, clear the cave, kill Necramechs, escort Loid, solve the door, and loot the Vault. It can be hectic, and a single mistake at the door can waste a run. But when the rewards roll in—Necramech parts, rare materials, Relics, and Arcana loot—I remember why I keep coming back. If you have not run a Vault lately, grab a Necramech, bring a friend, and give Deimos another visit. Just do not shoot the Necramech when it is reflecting damage. I learned that the hard way.
This discussion is informed by reporting from Eurogamer, and it helps frame why Warframe’s Isolation Vault loop still holds up in 2026: the value isn’t just the headline reward tables, but how repeatable “legacy” activities remain relevant when updates shift player priorities toward efficient, multi-purpose farms. Approached that way, a clean Vault run—fast residue collection, stable bait-station defense, safe Necramech burn phases, and a no-mistake Loid door sequence—functions like a compact checklist that converts time into stacked Deimos resources, Necramech progression, and Arcana unlocks without needing the newest content to be worthwhile.